Opportunity Backlog
Concept #
What Jeff Patton is advocating is that the Product Owner maintain a prioritized list of opportunities in the form of an opportunity backlog.
As a reminder, the three most important questions on an opportunity assessment are:
- What problem are we trying to solve? (why are we doing this)
- Who are we trying to solve this problem for? (target persona)
- How will we know if we succeed? (what is the outcome we are hoping for)
Elements Of The Opportunity Backlog Framework #
Broadly, the framework is about understanding problems, developing testable hypotheses, and gathering actionable feedback. I’ve included specific syntaxes in this article to make it easier for teams to standardize how they articulate problem statements, hypotheses, etc. If your team already has a standard way to define these things, feel free to continue using what works.
The steps of the framework are more important than how you format problems and hypotheses. I’ve included examples throughout to help clarify how to use the syntaxes.

Step 1: Identify & Define Problems #
writing effective problem statements Don’t spend too much time wordsmithing, but make sure the team agrees that the statement effectively describes the problem, and that it’s a problem worth solving;
Example #
“When I’m about to run out of dog food, I want to place an order for another bag so I can get it before my current supply runs out, but my order probably won’t arrive in time”.
Step 2: Describe The Opportunity #
After defining a problem, reframe it via at least one “How might we…” statement to convert the problem into an opportunity for which the team can begin to conceive solutions.
Example #
“How might we help customers make sure their orders arrive before they run out of their current supply?”
Step 3: Define Your Hypothesis #
- You’ve articulated a problem, and presented it as an opportunity with at least one How might we… statement. Now it’s time to start conceiving potential solutions, but we’re going to use a bit more rigor than immediately jumping into sketching, prototyping, or coding. We’re going to write out one or more hypothesis.
- The most important part of this step is defining what the team plans to do to fix the problem and what success looks like.
Example #
“We believe a monthly auto-shipped pet food subscription for our customers who forget to re-order their supply will achieve a consistent and reliable supply of food, ensuring pet owners don’t run out.”
Teams can and should come up with multiple hypotheses based on the problems/opportunities. Instead of a pet food subscription, maybe the solution could be a scale or container that weighs the amount of food and alerts the pet owner or auto-orders more when the supply gets low. Maybe it’s building more local warehouses across the country to store and deliver food faster. There’s very little cost to writing hypothesis statements
Step 4: Create Concepts #
Create MVE
Now it’s time to create a stimulus that we will use to get actionable feedback from the users whose problem we’re trying to solve. The goal for the team at this point is to deliver a Minimum Viable Experiment (MVE)
something users can react to that most effectively tests the hypothesis with the least amount of effort for the product team to create.
There is no single way to produce an MVE. They can (and should) take many different forms depending on what the product team is trying to learn: hand-drawn sketches, lo-fi prototypes, fully-functioning code, user interviews, surveys, etc. Images or descriptions of your MVE can be added to column 4 of the backlog.
Example #
A marketing email promoting a new monthly pet food subscription sent to customers who are often placing last minute food orders.
Step 5: Test & Validate #
Once the MVE has been created it’s time to get it in front of the target audience that was defined originally in the problem statement and again in the hypothesis to collect user feedback. Using our MVE pet food subscription email example, the team could track open and click-through rates on the email, or track sign ups for the subscription service on a “Coming Soon” landing page. Take aggregate and verbatim user feedback about the concept and add it to the final column of the backlog.
After receiving user feedback we can determine whether or not the concept described in the hypothesis passed muster. Did it help solve the user problem? If yes, great — graduate to the product backlog! If no, great — now the team knows what doesn’t work! And don’t forget to share and celebrate what you’ve learned either way.
The more we experiment & collect feedback, the more we learn about our users, their needs, and what they value. New problems can be discovered along the way. New hypotheses & potential solutions can be developed and validated. It’s practice—a continuous cycle—always focused on identifying and solving user problems.
“Individual freedom… to express themselves… by adhering to the overall framework.”
Advantages of Opportunity Backlog over Roadmap #
Where do they come from? #
Opportunities on the opportunity backlog can of course come from anywhere (just as with the product roadmap), but the two most important inputs are
The product vision the bigger picture of what you are trying to achieve
The Product Scorecard the prioritized business objectives for this team.
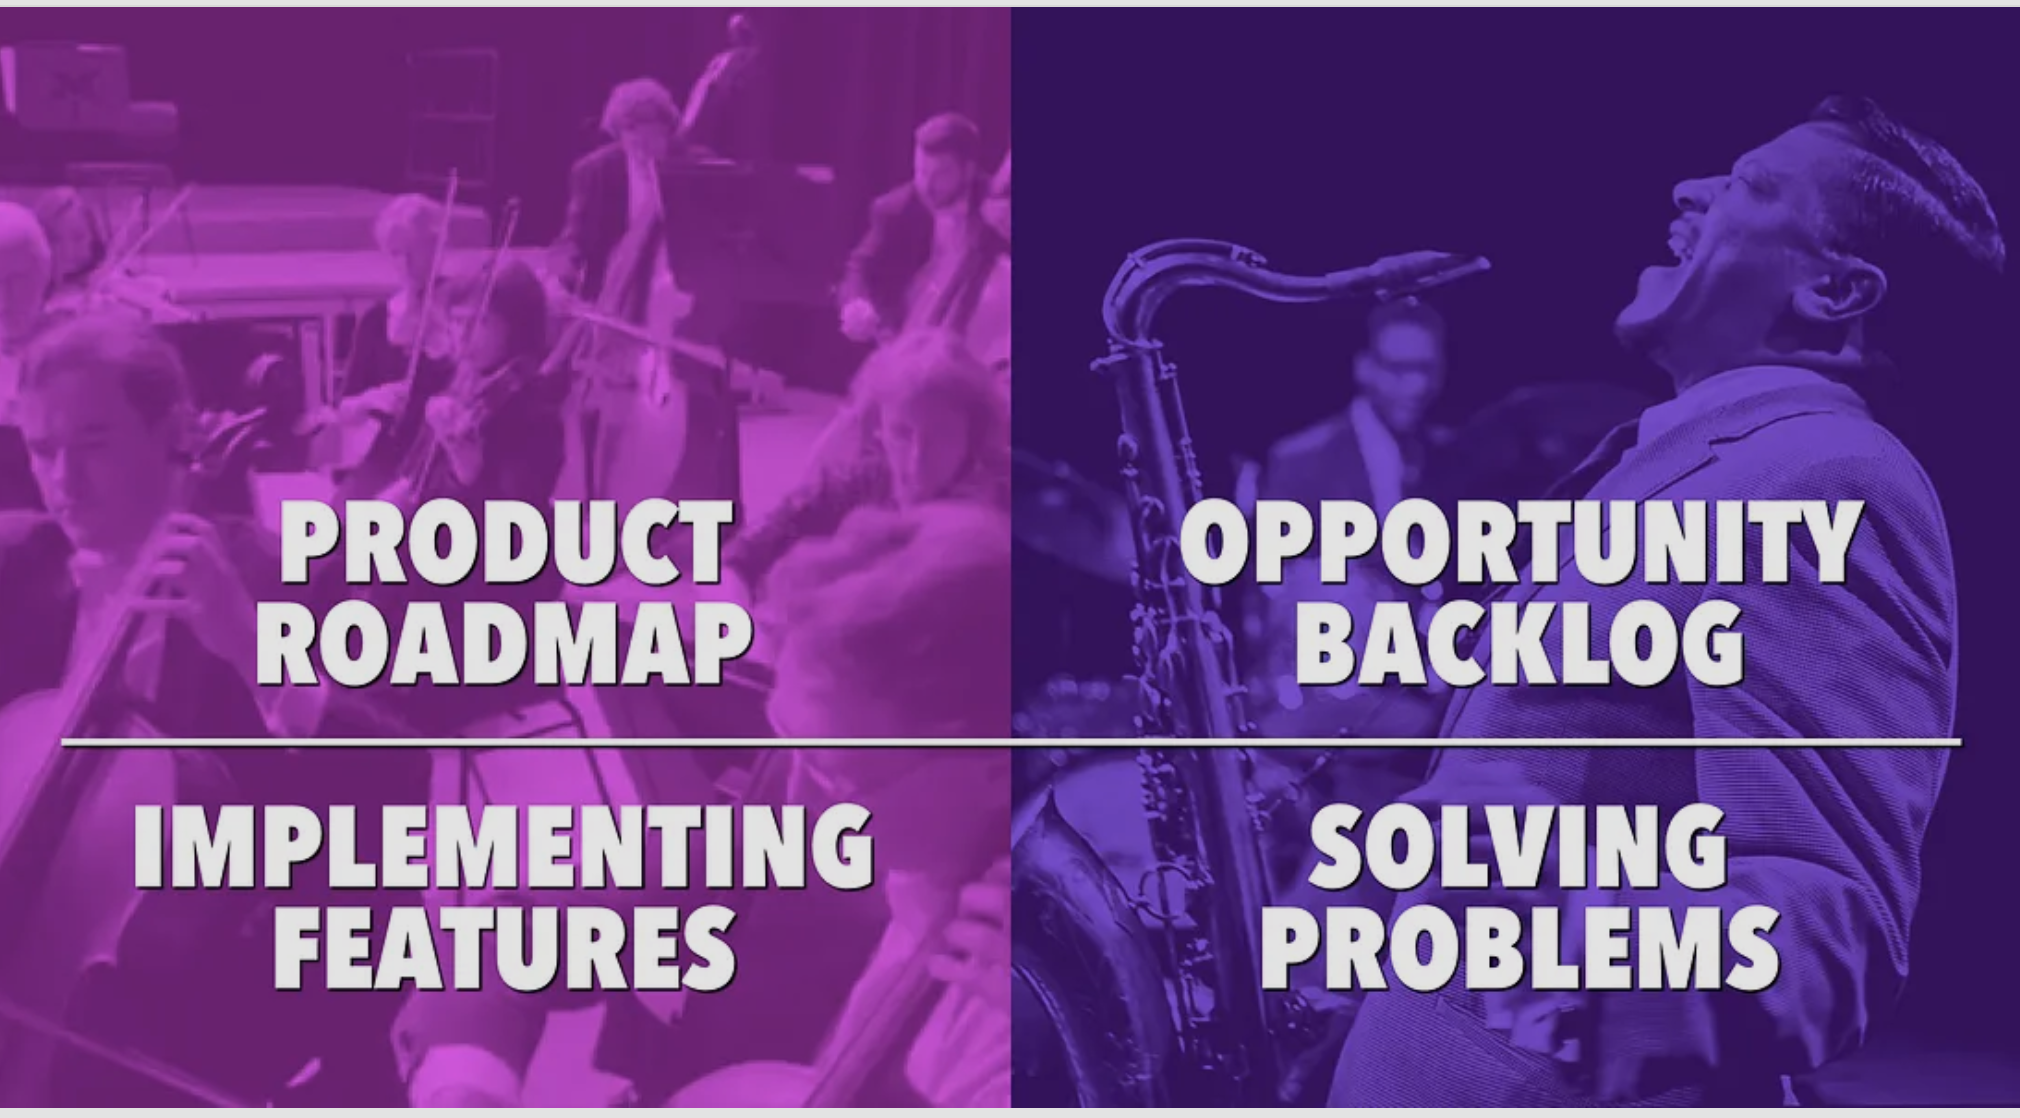
Difference between Opportunity Backlog and Roadmap #
classical music Planned feedback not required.
 Jazz Music: uses feedback

Sample Templates #
- Opportunity Backlog Example done in Figma for ProjectX PDF
- figma
- Opportunity canvas pdf recommended by Jeff Patton downloaded from here